
When colorizing an old black and white portrait we sometimes want to do more than just colorize and bring it to life. We want to see a different view of the person.
Using Photoshop and select AI (artificial intelligence) tools, I have created a new portrait of my 4th great-grandfather, Jackson Chaney (1817-1894) based on a photograph taken circa 1888. This new portrait is not just another colorization of a black and white photograph but a reconstruction featuring a rotation to a face-forward view of Jackson, who is also now donning modern attire.
I’ve been asked to share how I made the colorization and facial angle change in the image below. While I will not go into all the minutia, I will give a basic breakdown of how it is done. The author is assuming that the reader has rudimentary colorization and compositing Photoshop skills. If not, tutorials are listed at the bottom of this post.
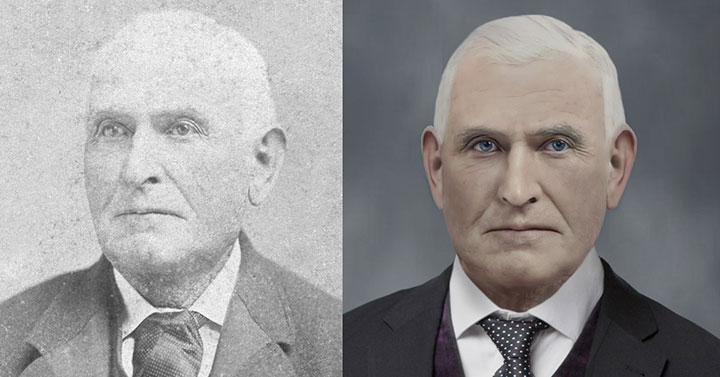
It is said the eyes are the window to the soul which likely explains my preference for portraiture where subjects are facing the camera. There is something about looking directly into someone’s eyes to help understand their character. Unfortunately, in the case of my 4th great-grandfather, no front-facing photographs are known to exist. But, now with Photoshop and select AI tools, it is possible to change the facial angle in a photograph.
Unlike my life mask reconstructions, where the purpose is to reduce or eliminate “artistic license,” this type of reconstruction has to employ quite a bit of artistic license. However, I did my best to keep the final image as close to his true likeness as possible.
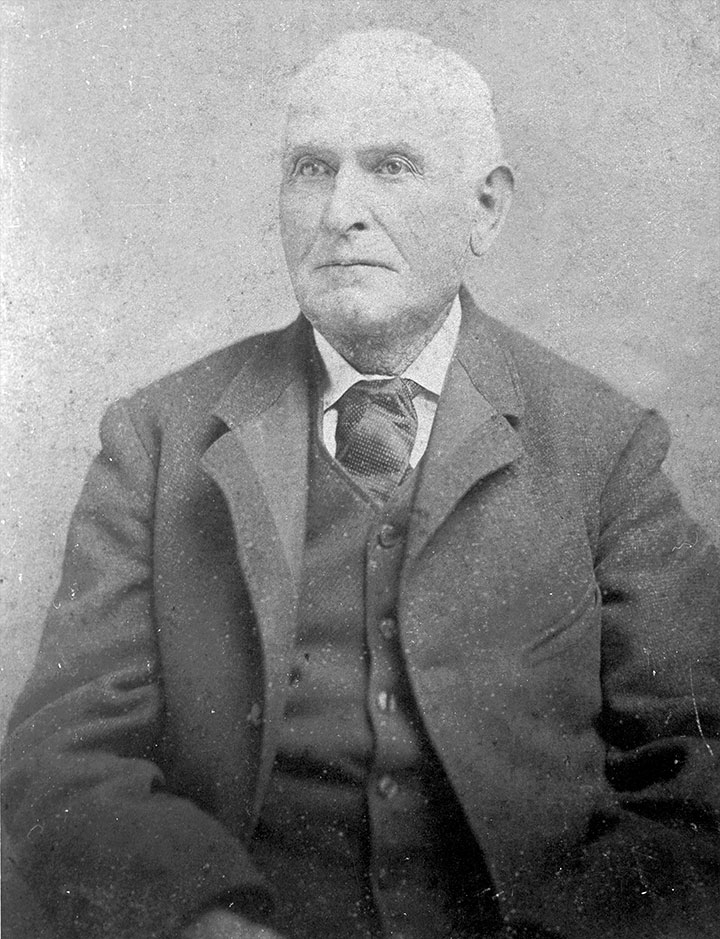
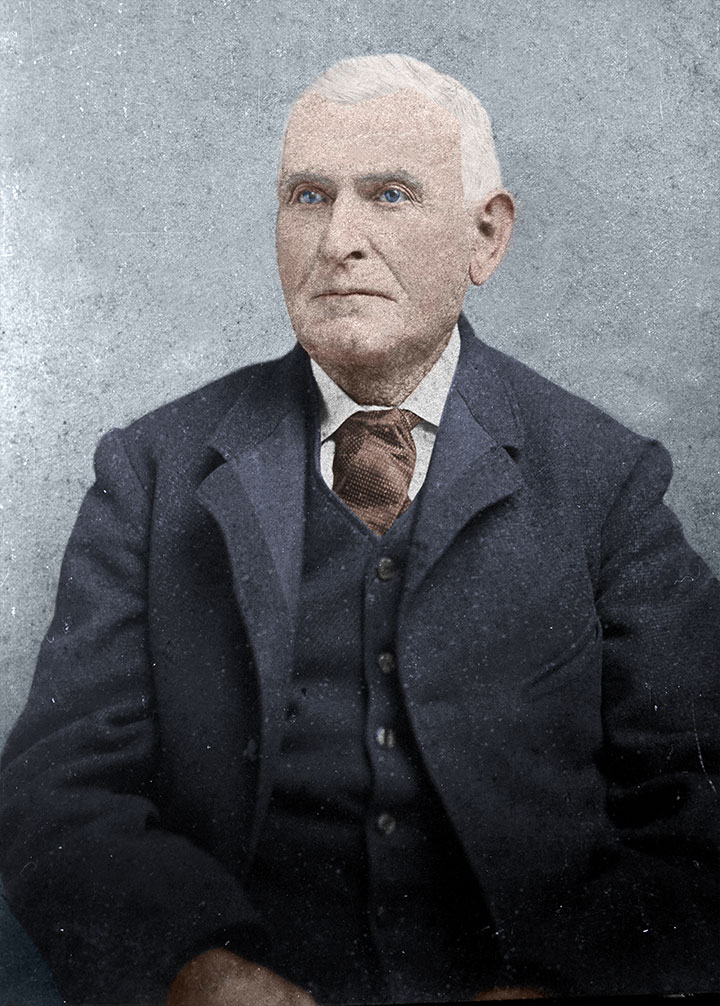
For example, the original photograph of Jackson shown below is lacking in detail and gives me little to go on with respect to his hair. Sadly as much as I hated to do it, I had to take a little artistic license and interpolate his hairline on top. To arrive at where I did I didn’t just guess at it blindly. However, I based his hairline on his grandson’s and his 2nd-great-grandson’s (my grandfather) hairlines, both of whom favored Jackson. While we will never know for sure I chose blue for his eye color because blue eyes are prevalent in the Chaney family based on a family historian’s information. So even when artistic license was required it was done based on known family traits.
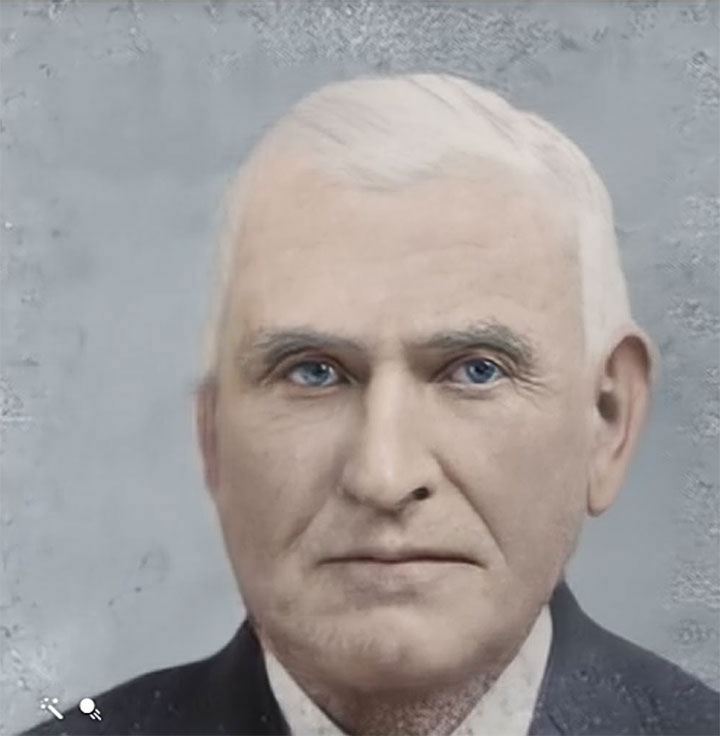
Let’s begin with the process. Below is a colorization of the above image with hair taken from another photograph and blended onto his head.
Next, the image is processed through the Remini Photo Enhancer app. Remini is a free phone app, at least for the first few renders. You can also use Remini on your PC with a phone emulator. I use Blue Stacks Android emulator, also free.
Here is the same image after Remini processing.
As you can see, Remini sharpens and smooths the skin giving the image a more life-like appearance.
The Remini rendered image is now uploaded to MyHeritage website to be animated.
MyHeritage animation app is free, but there is a paid version. For me, it was worth the purchase as I use the software a lot, especially for my life mask reconstructions. In addition, the purchased version gives you up to ten general animation styles and ten special animation styles.
The animation part is where you will have to play around with this a bit. I chose a still frame from the animation to place into Photoshop to create the final image.
The image below is a still frame from the MyHeritage animation.
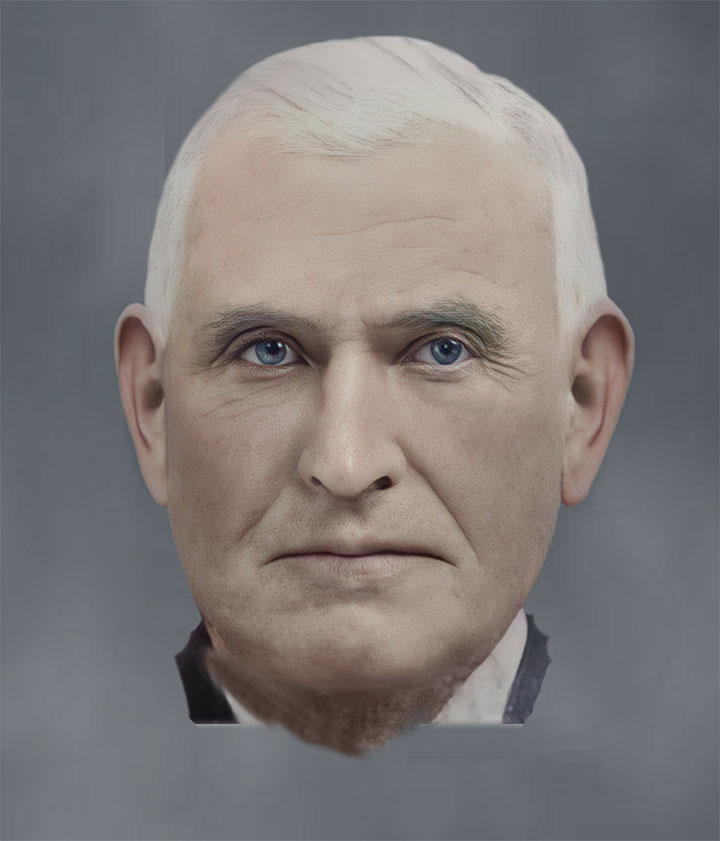
While the facial angle is what I’m looking for, his right ear is missing, the right nostril is distorted, and the right side of his mouth isn’t right. In the case of the ear, the AI can’t render what is not there, at least not yet, I’m sure AI will be able to do this in the future, but we have to work with what we have now. I placed the image above back into Photoshop for more touch up.
The image below shows the still frame with some touch-up.
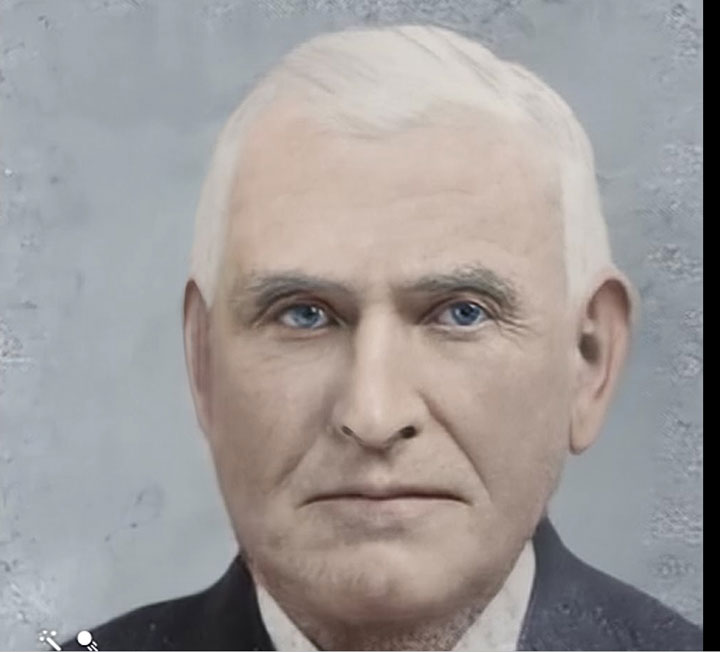
With Photoshop, I added a realistic right nostril and adjusted the right side of his mouth. I also added hair and a rough right ear. Now, it’s time to run this image through Remini again.
The image below is the new Remini render.
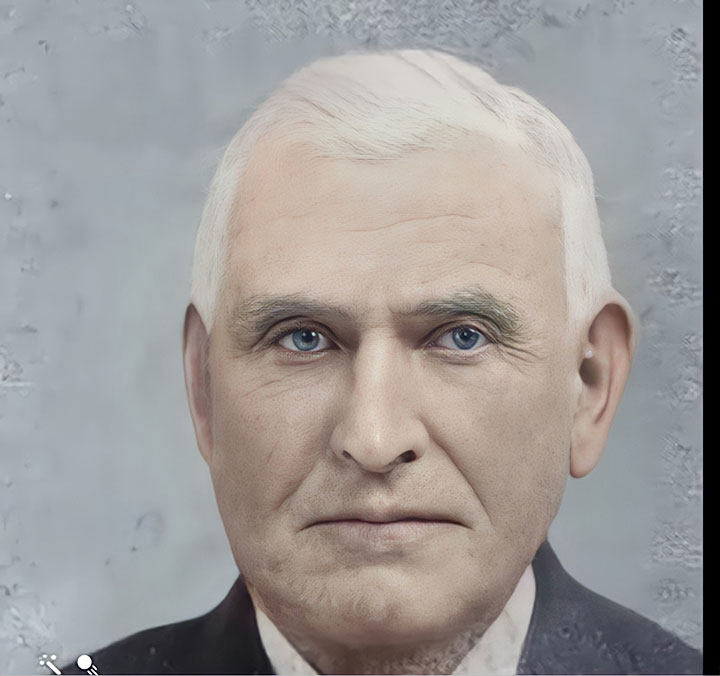
Now the image is starting to look more realistic, but there is still a lot of work. This image is now placed back into Photoshop.
In Photoshop, I cut the head out, placed it on a new background, copied his left ear, and modified it into a right ear using the warp tool as to not look like an exact duplicate of the left.
At this stage, you need to go back and look at your original photograph and make sure the facial adjustments match up to the actual likeness as much as possible.
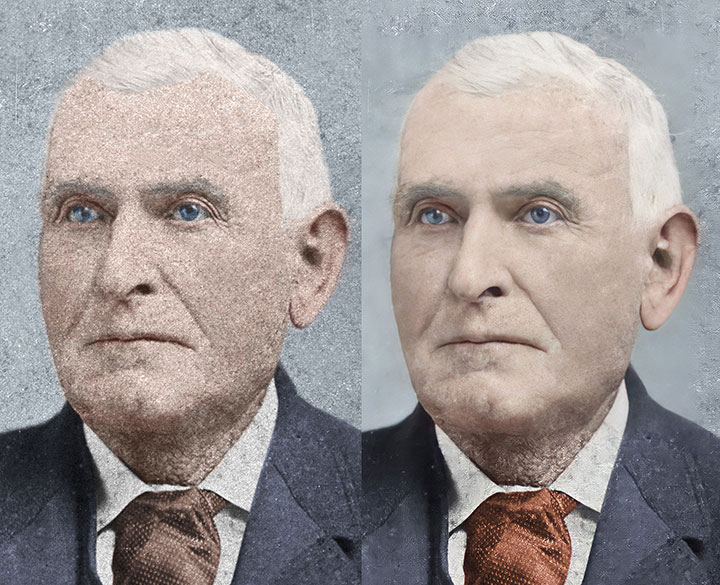
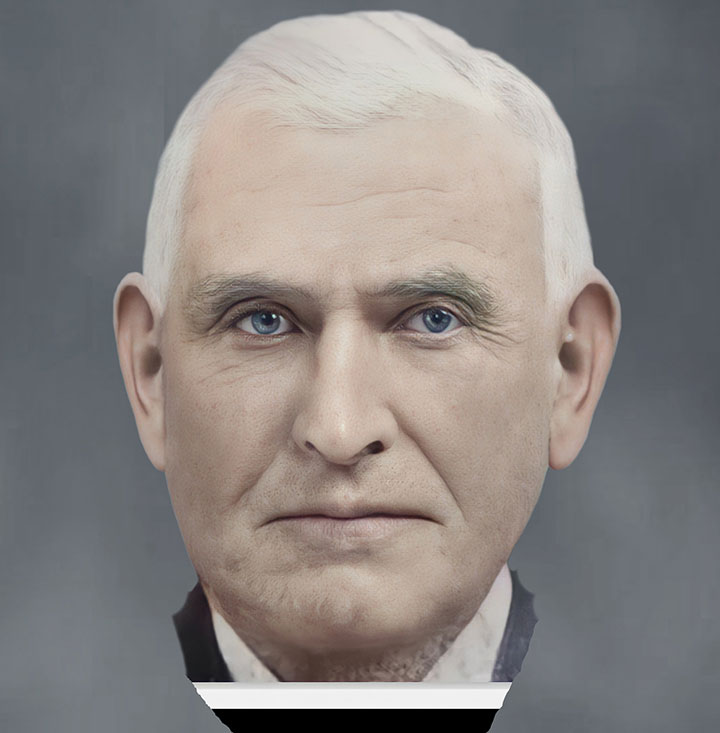
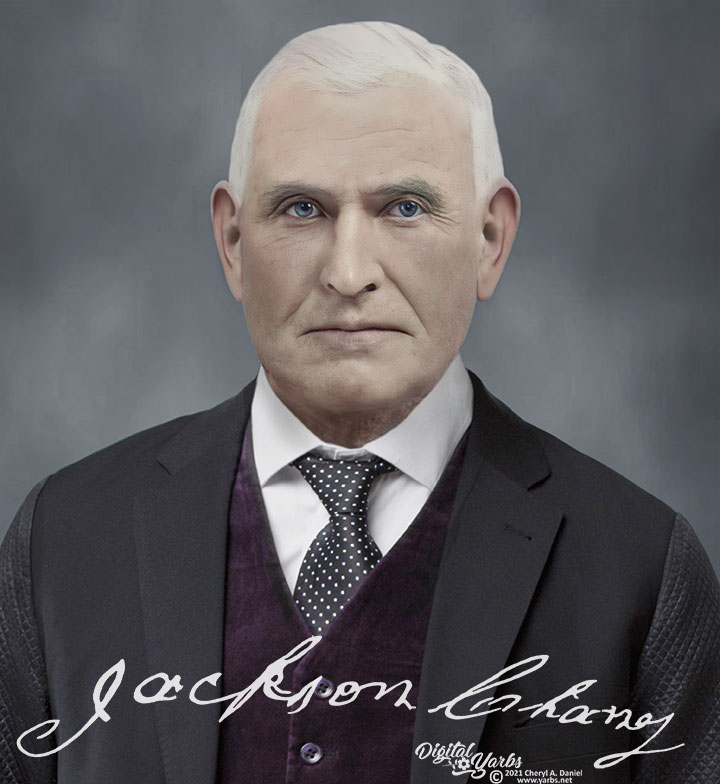
The image below is the final iteration after many more tweaks.
Hue Saturation layers are used to add color to his face and ears. I adjusted the eyes, brows, and nose to match the original image as closely as possible. The face could, perhaps, use more tweaking. I find that I could tweak forever and never be satisfied, but I’m happy with it at this point.
Below is a close-up of the final image with a modern-day suit.
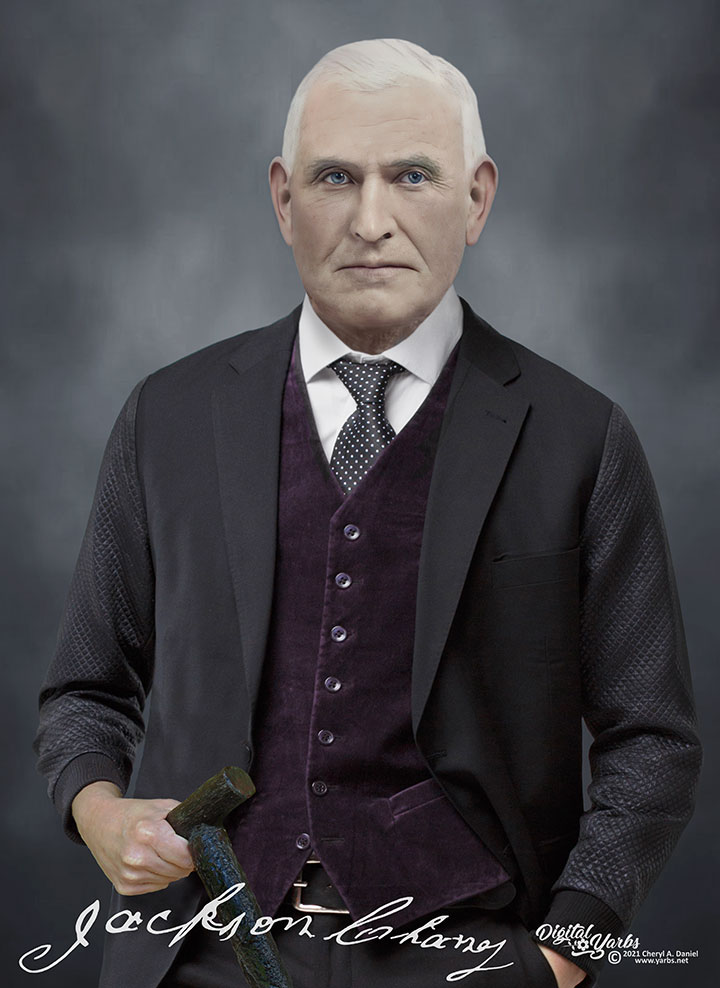
Final image below with suit and walking cane added.
In a nutshell all that is needed to do a facial angle change is :
- Colorize your original
- Process it through Remini
- Tweak the processed Remini image in Photoshop for the desired result
- Run the tweaked image through MyHeritage animation app.
- Select the best still frame image from the MyHeritage animation
- Tweak the still frame in Photoshop for the desired result.
- Run the tweaked still frame image back through Remini
- Tweak the final Remini render in Photoshop for the desired result.
Tools:
MyHeritage Deep Nostalgia Note: The paid version may be needed for the best result.
Helpful Tutorials:
PiXimperfet Tutorials: https://www.youtube.com/c/PiXimperfect
PHLEARN Tutorials: https://www.youtube.com/user/PhlearnLLC
See all of my Photoshop Works at Digital Yarbs


Interesting. Does Remini output high enough resolution files to print from? It being a phone app i’ve over looked it so far but it looks like it could be useful for some of our projects.
Hi Gareth,
I use Remini on the PC with an Android emulator, Bluestacks. This makes it a little easier on the eyes. For me, it’s hard to work on a phone screen. Anyway, Remini, unfortunately, renders in 72dpi. I can still use it with my prints as I have a huge 300dpi PSD and Tiff master files. Remini only accepts jpg, so I save my master file as the highest possible quality jpg copy for Remini . I run the file through Remini. Remini is a little strange at times. Sometimes I will get a render back with larger dimensions than my original, but it will still be 72 dpi. I bring the Remini rendered file back into my 300 dpi file and make it work in Photoshop. The key is to have large dimensions on your master image to begin with. The largest prints I do are 16×20, so I don’t know what it will look like for anything larger than 16×20. I hope this helps.